Blinks is not that complicated: Blinks first experience and creating a Blinks NFT collection
Blinks has become very popular recently. All I see are Blinks. I keep hitting this and that, and my head is buzzing. What is Blinks and what is its secret?
Today I tried it myself and it turned out to be just like that. To put it simply, it is: convert the on-chain operation to Blink and share it on Twitter. Through the link (URL), you can directly perform on-chain operations such as voting, donation, minting, swap, payment, etc., without jumping to the dApp page to operate, which simplifies the process. If you want to try it, you can follow my steps:
1⃣ Install a wallet that supports Blinks, such as Phantom, Backpack, Solflare, OKX, etc. Since I have always used the OKX Web3 wallet, I used it directly to experience it
OKX Web3 wallet needs to be upgraded to version 3.2.2 or above to experience the Blinks feature. If you haven’t upgraded yet, please upgrade: Click the extension button in the upper right corner ➡️ Manage extensions ➡️ Open developer mode ➡️ Update
2⃣Post the URL you need to interact with to Twitter, such as Send it NFT purchase: https://okx.com/zh-hans/web3/marketplace/nft/collection/sol/send-it
Click to buy directly from your Twitter
Click Connect Wallet in the OKX Web3 wallet pop-up window, authorize, and confirm to complete the purchase. For example, to purchase $WIF tokens, you can click a fixed amount or enter a custom amount, click Buy, and complete the purchase after the wallet signature is confirmed: https://okx.com/zh-han/web3/dex-market/detail/501/EKpQGSJtjMFqKZ9KQanSqYXRcF8fBopzLHYxdM65zcjm#rankType=19
Another example is Mint NFT Neon Seraph (just an example, minting is not recommended):
#Blinks #Blink #Practical Tutorial
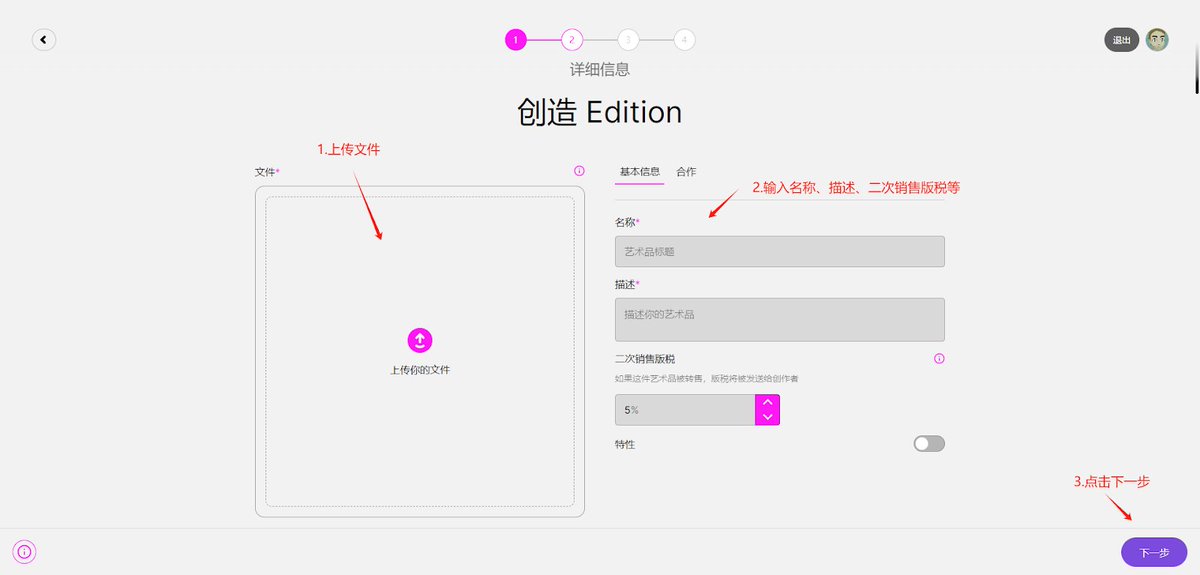
Tutorial on creating a Blinks NFT collection Go to the website 3.land 3.land/create Connect your wallet, create an account, and click Start creating
After you finish your creation, you can also share it on social media
The following is the link of the NFT I created. It is free to mint and only requires gas. If you are interested, you can mint one (it has no value and is purely for entertainment): https://3.land/item/FmhpQbxDet9Z7xvqHYQGz44aj6Zgq5cnTcv91WXfkdaj
Disclaimer: This tutorial is for popular science purposes only. Any entrepreneurial project initiated based on this tutorial has nothing to do with me!


