Source: 0xleon.notion
Author: BroLeon | 2024 Reload
Bouncebit's event has started this morning. Most of the veterans have completed the tasks and are getting their points. I played it myself and found that it is still a bit troublesome for many newbies.
A whole day has passed, and only less than 30,000 people have completed the task. I promised to give you a tutorial before, so I will take some time to teach you step by step.
The activity is mainly divided into two parts:
1. Deposit regular BNB
2. Go to Web3 wallet to do the task
1. How to deposit BNB regularly
Click on the small yellow picture in the upper left corner of the App to open the service menu and find Financial Management.

Select 15-120 days
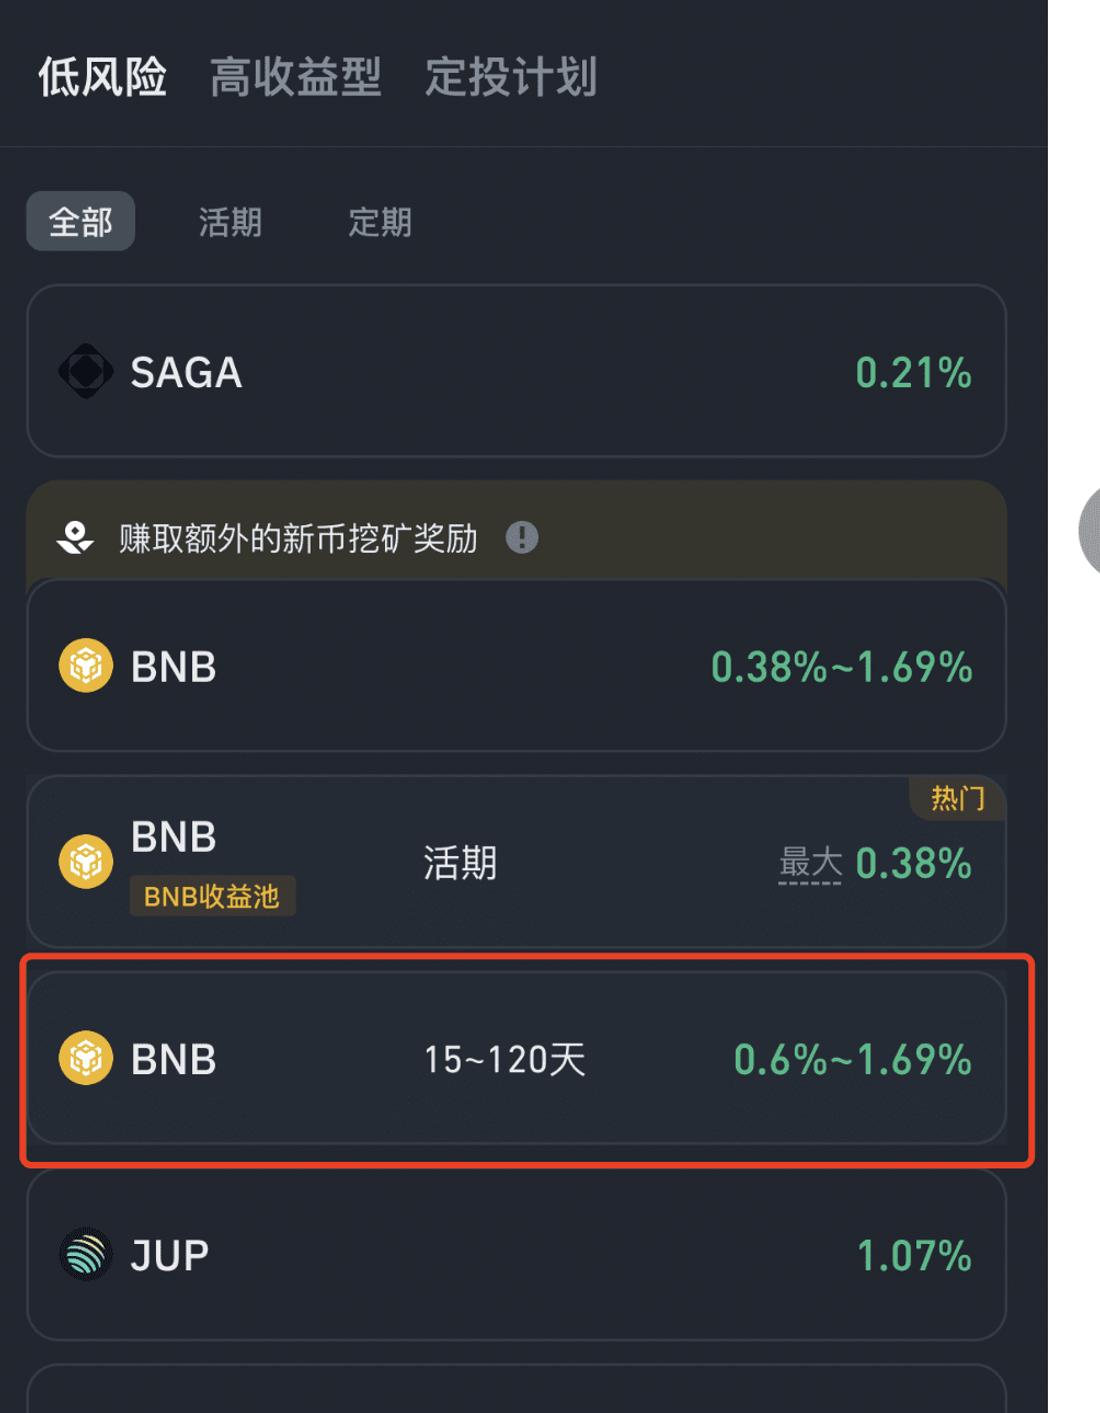
In the interface that opens, you can select the duration of the BNB you want to lock according to your personal preference . The longer the duration, the more BNB you lock and the greater the points you get. I chose 120 days directly. This way, you can get an annualized interest rate of 1.69% and the highest Bouncebit points multiplier.
2. Go to Web3 wallet to do the task
This is relatively troublesome. It is recommended that you keep some BNB in your spot wallet , at least worth $30, because there may be many tasks to be completed later. Preparing the Gas at one time can save you from repeated operations later.
When you are ready, click on the small yellow picture in the upper left corner to open the service menu, find Megadrop and click on it.
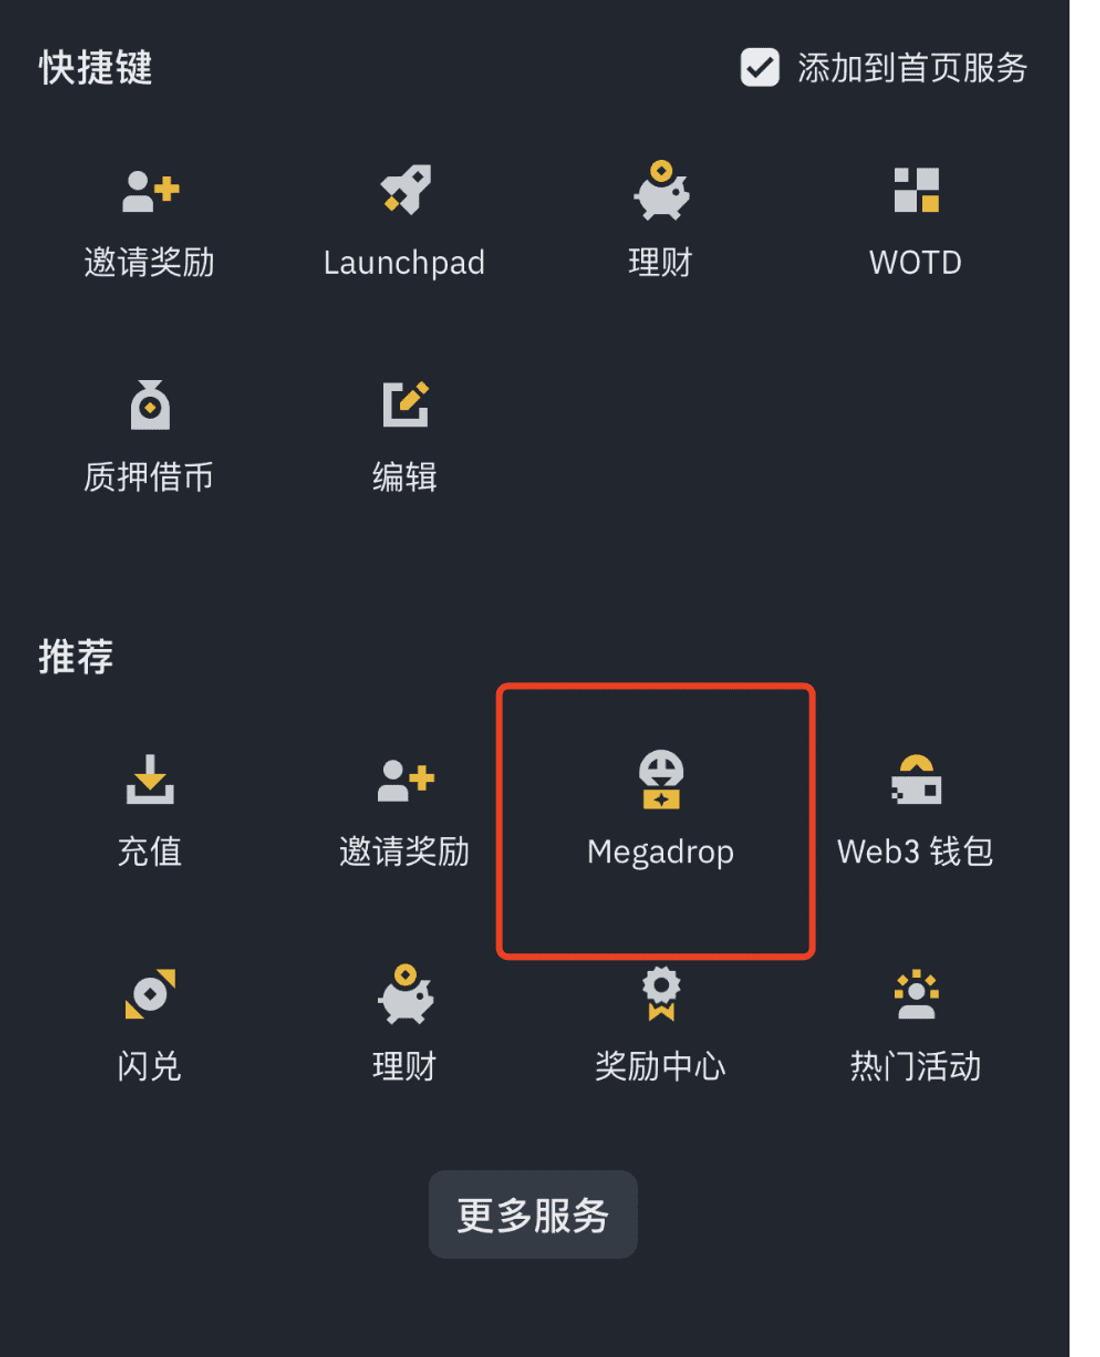
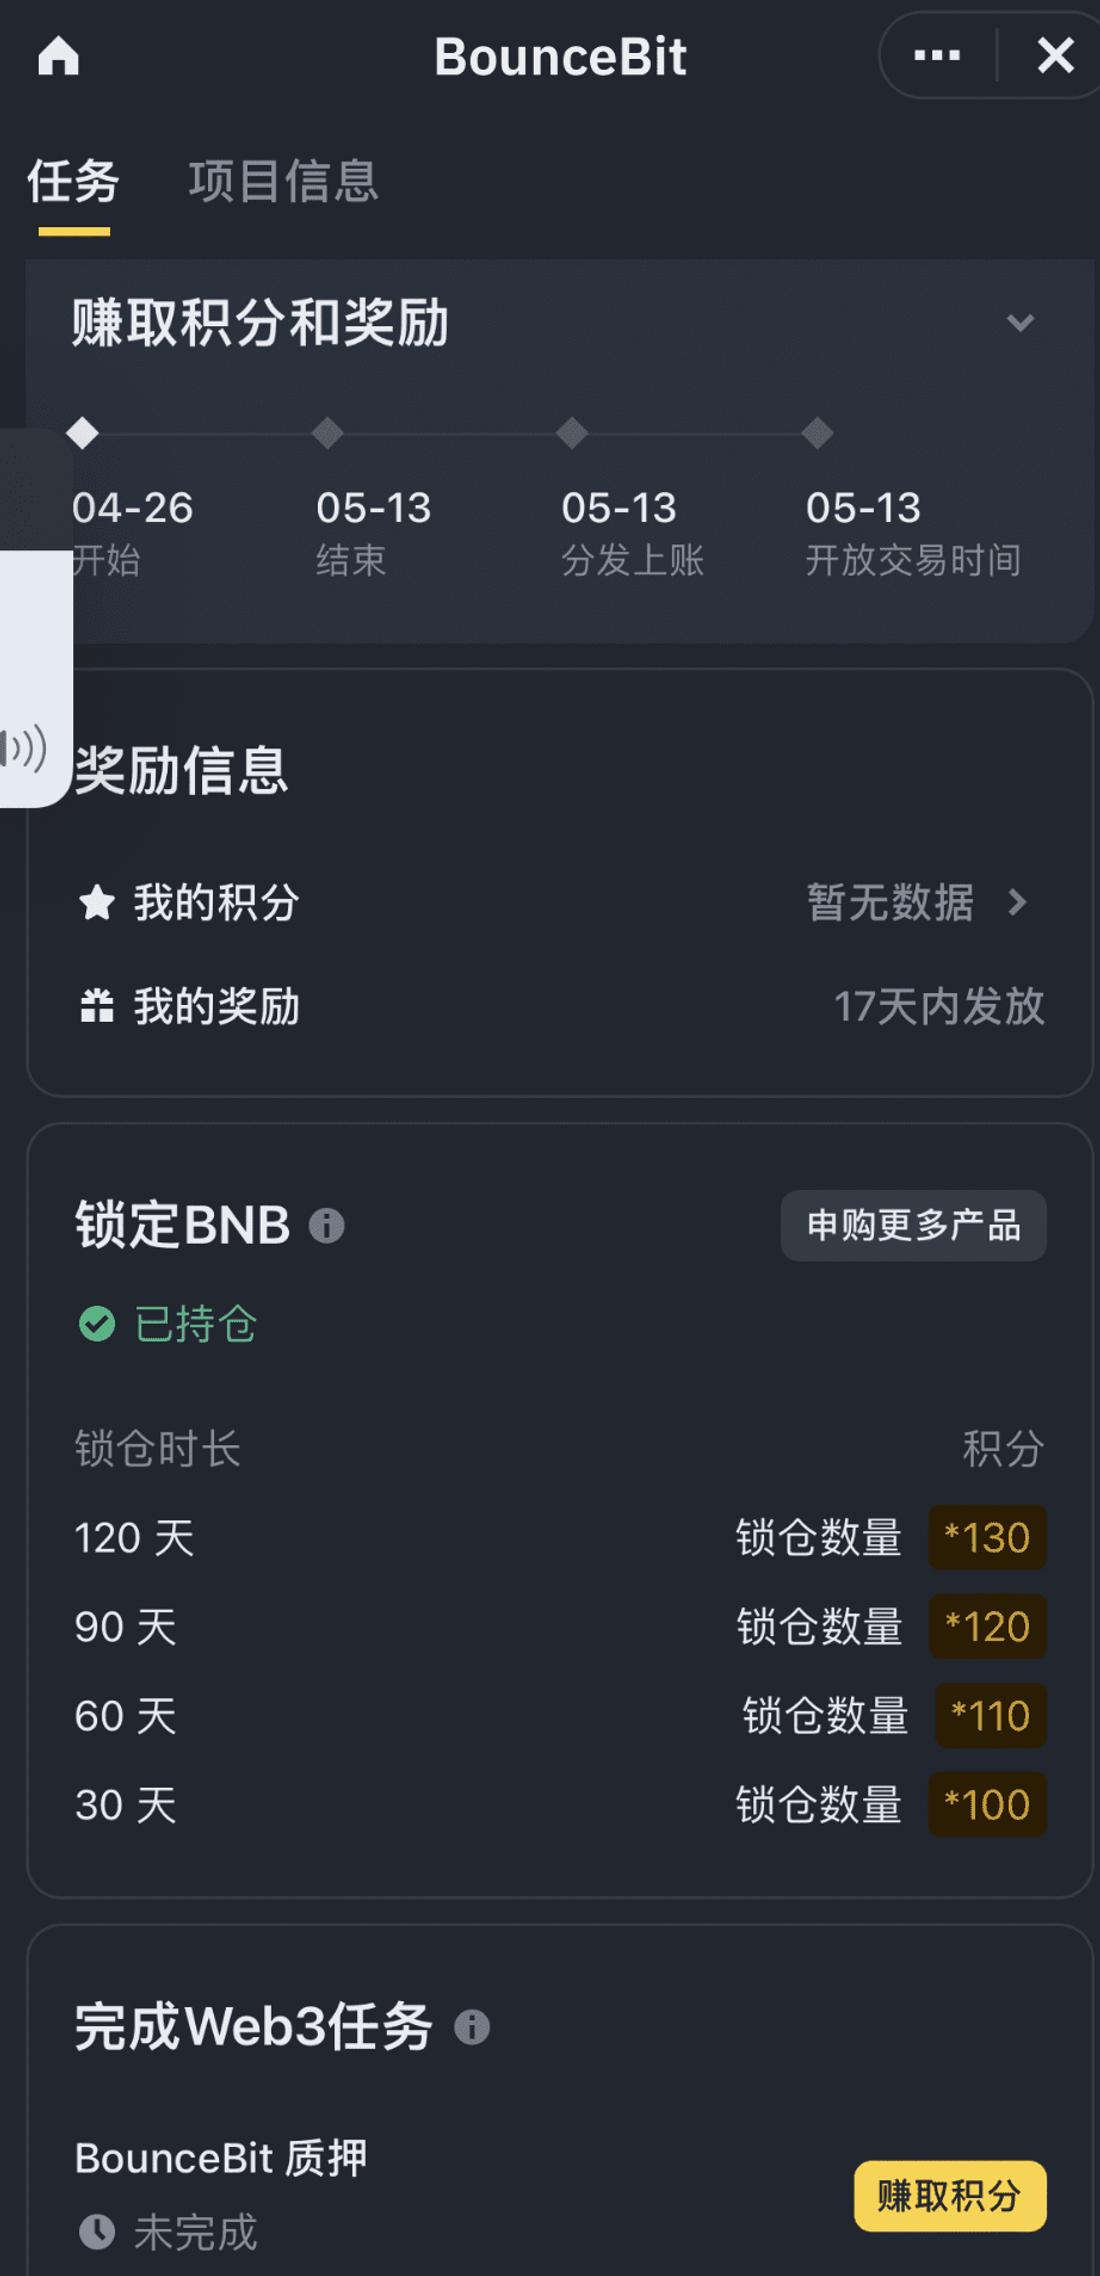
In the opened interface, you can see your points and task completion status. The earlier you start, the more points you will get, so it is recommended that you start as soon as possible after reading the tutorial.
Click the yellow button at the bottom "Earn Points", and you should be asked to create a Web3 wallet. Remember that directly imported wallets do not count, you must create a wallet through the Binance APP. On the next page, click Start Now.
Then you will be asked to create a wallet and back it up.
After creation, both backup methods are available, you can choose one at will, but if it is a password or QR code, remember to save it.
Once you have done this, you will have a Web3 wallet, and many operations can be performed on the chain in the future. Many friends said before that they didn’t know how to play on the chain, so having a Web3 wallet is the beginning.
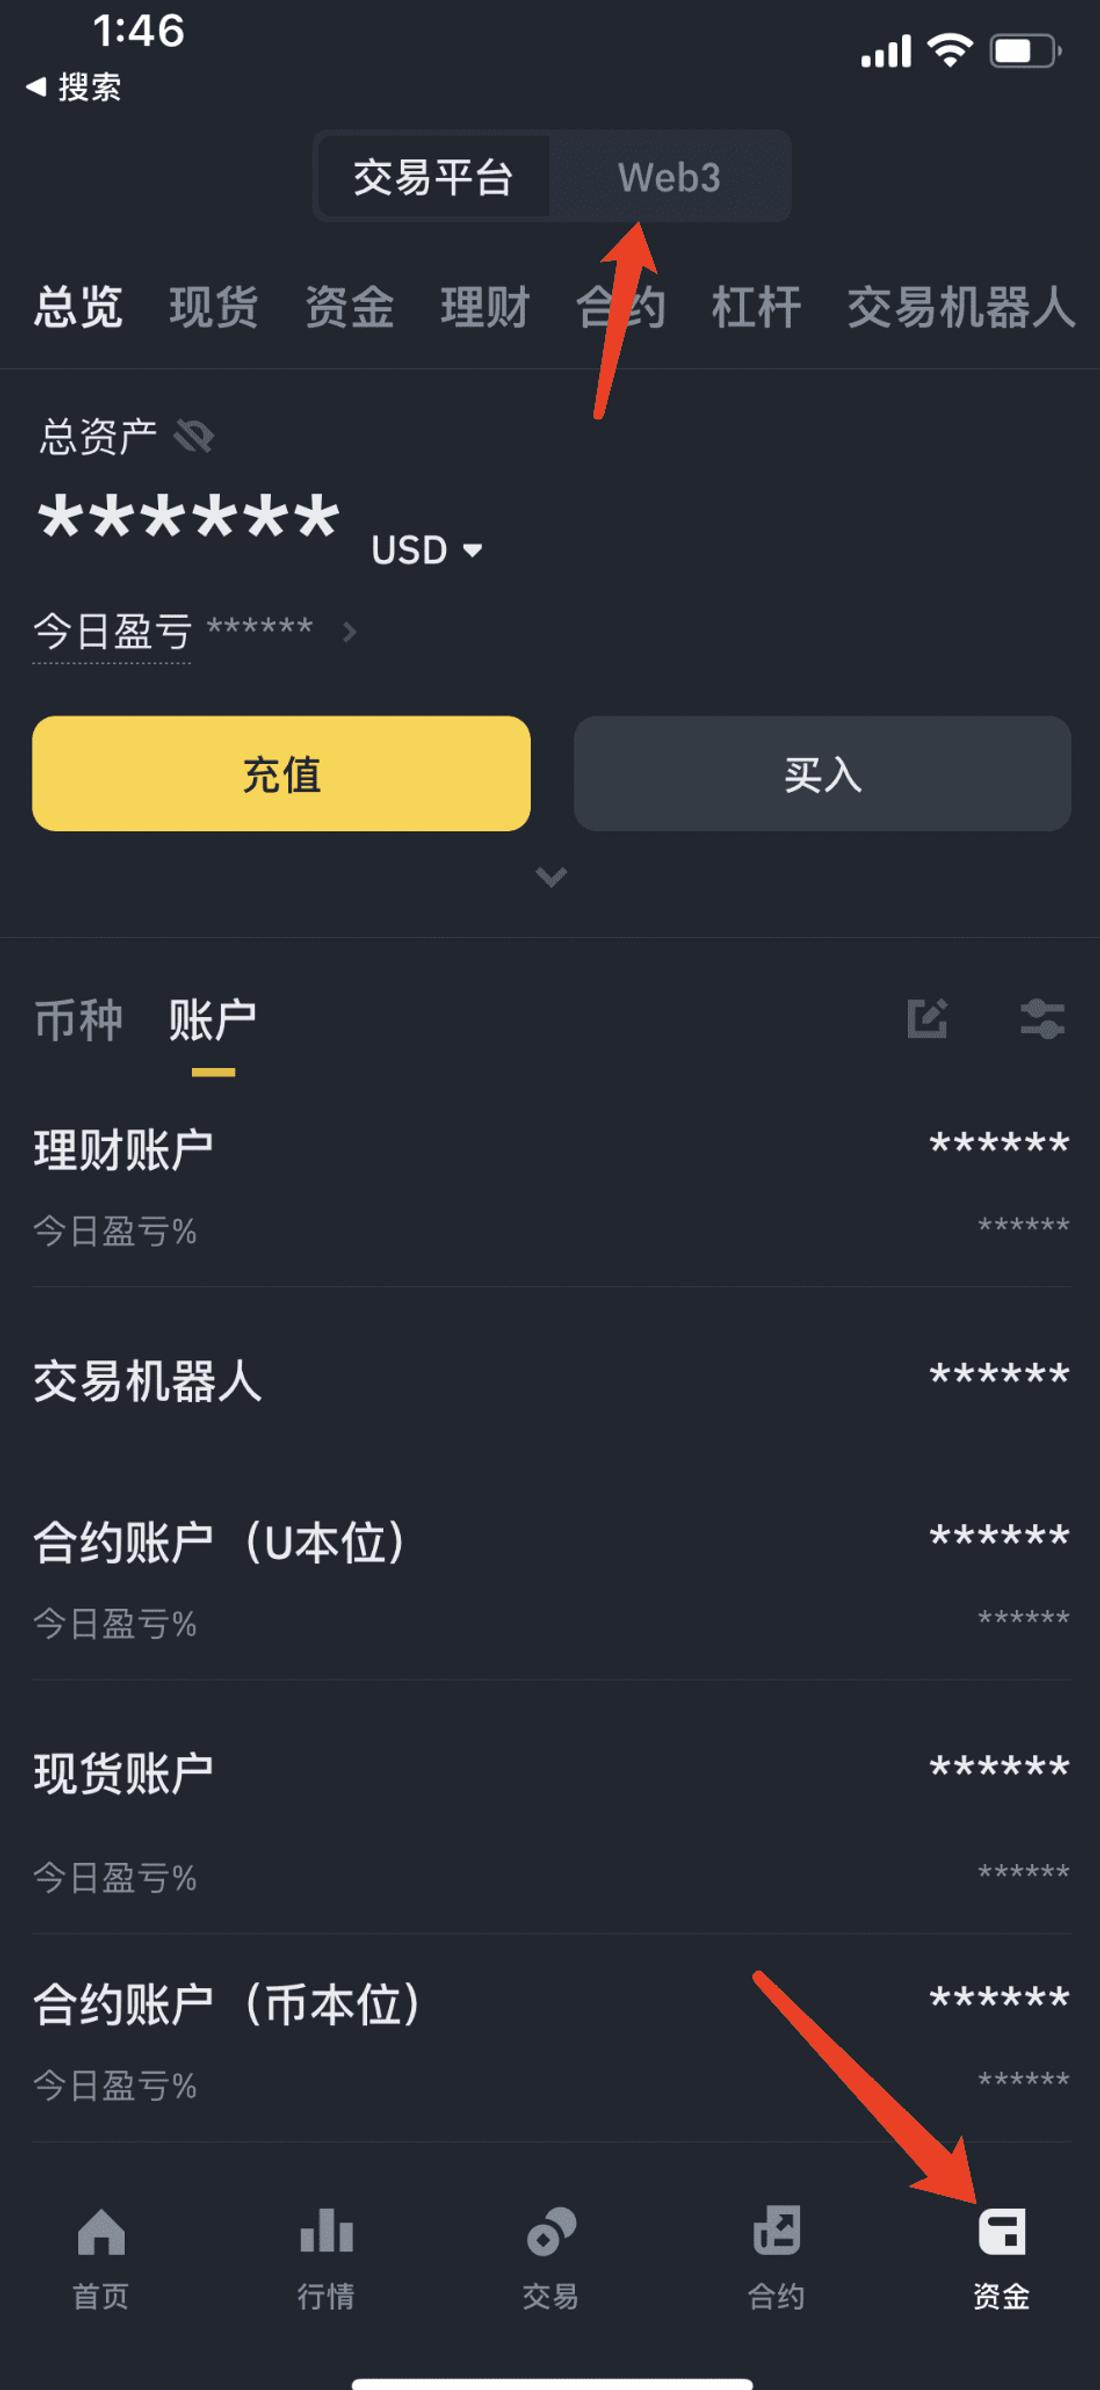
Now when you click the funds button in the lower right corner of the Binance app, you will find that there is an additional Web3 option at the top. In the future, you can easily switch between the app and wallet with one click.
Now try clicking the Web3 button. Since you don't have any money in your wallet yet, select the transfer function and transfer the previously prepared ** BNB ** from the Binance APP . Remember to turn on facial recognition confirmation, otherwise the subsequent confirmation will be very troublesome.
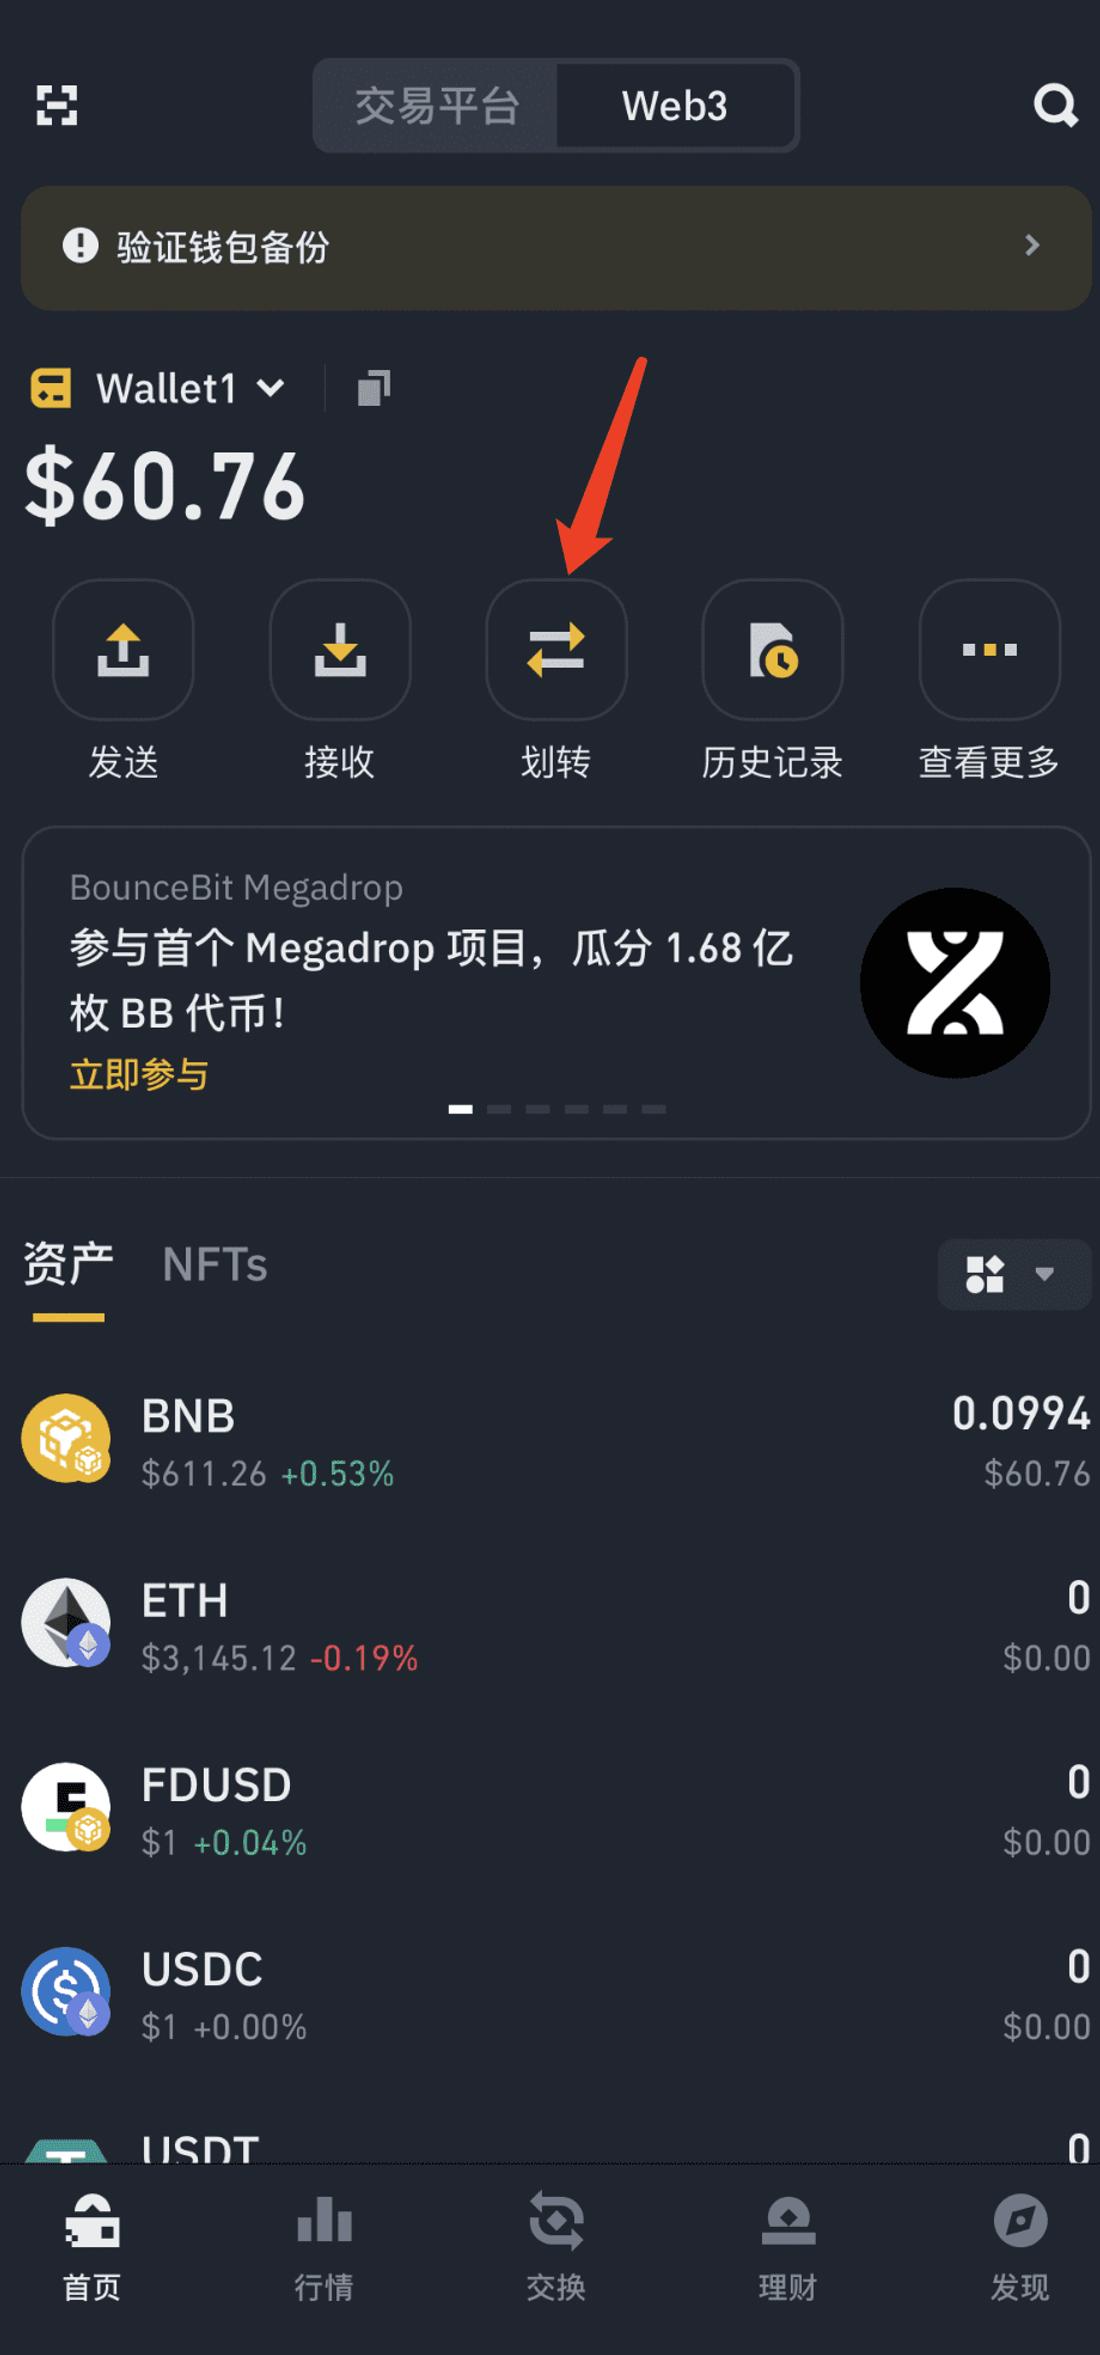 Next, click Transfer
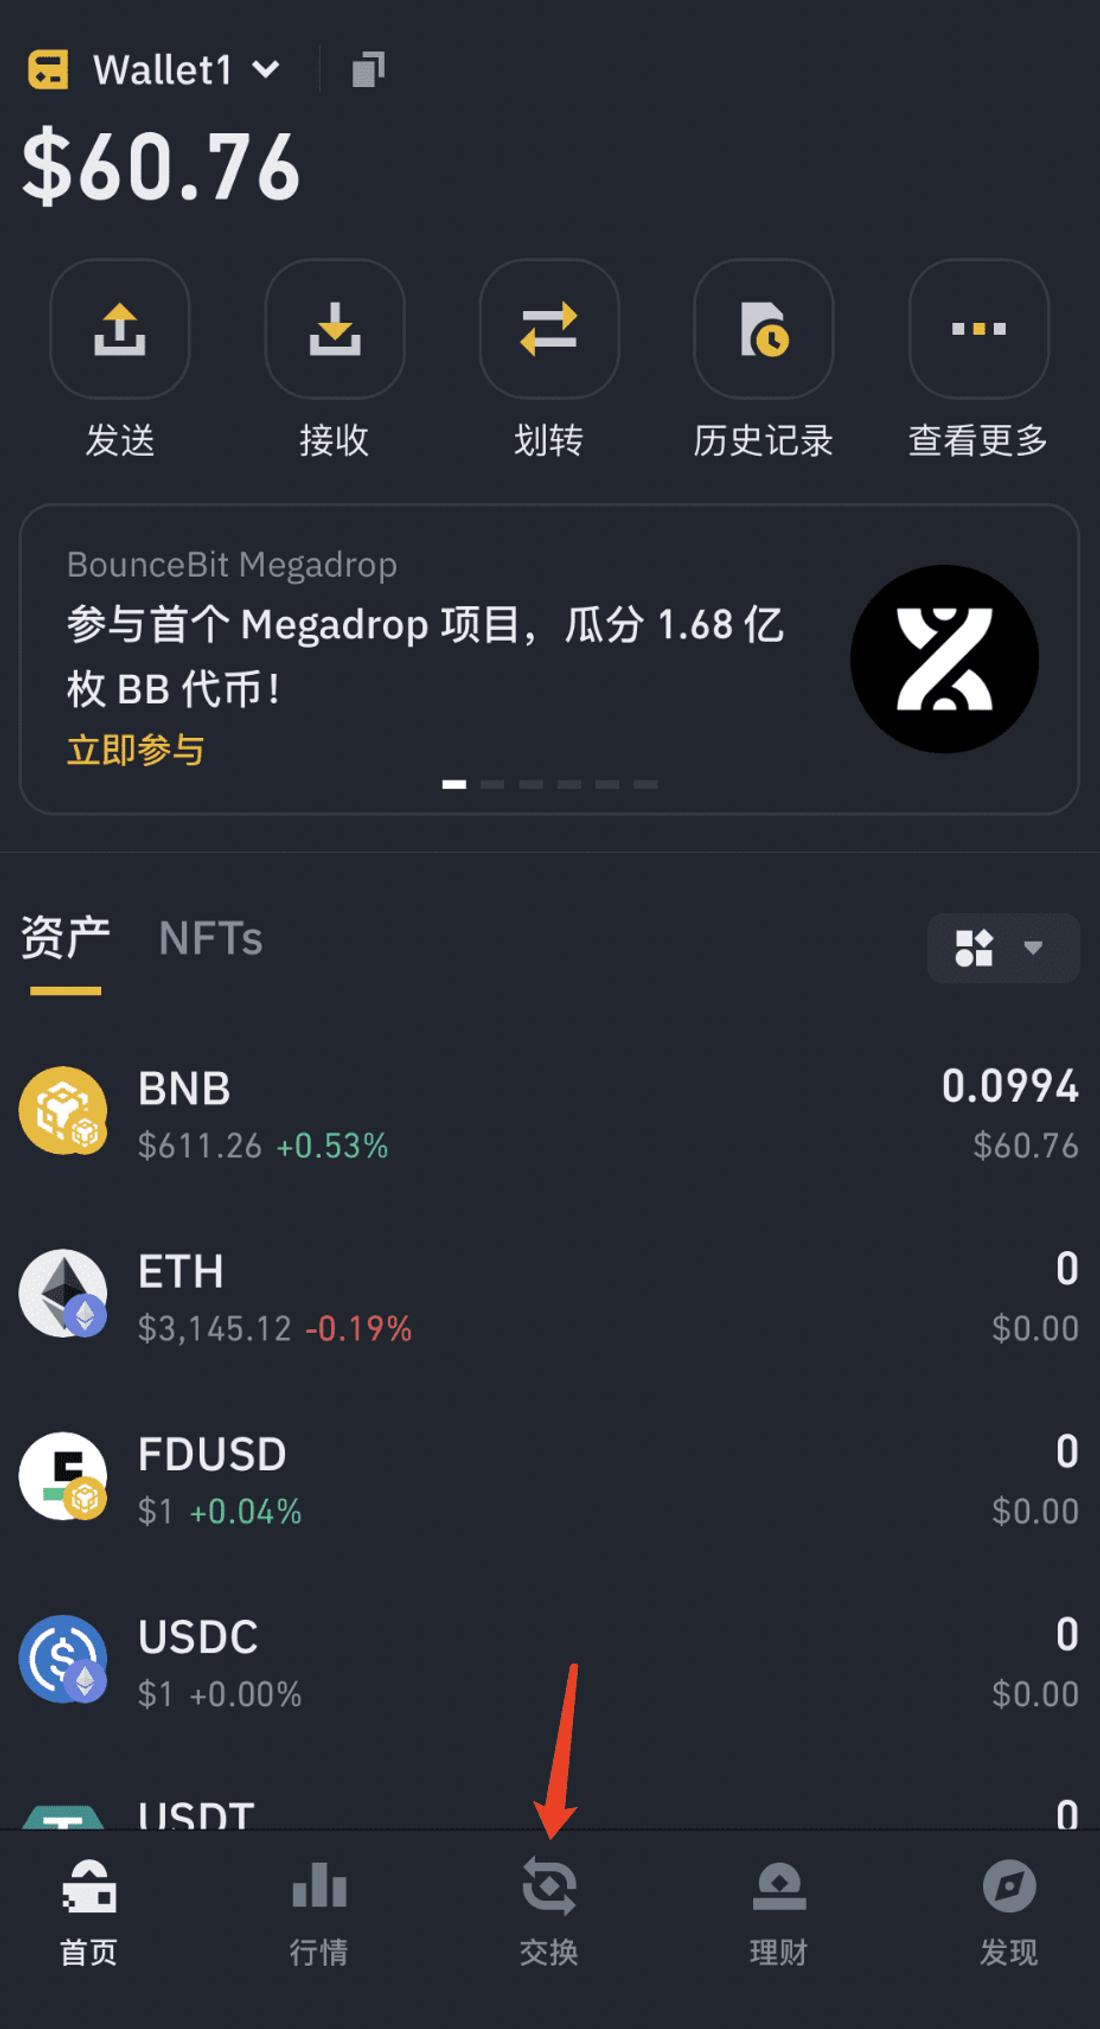
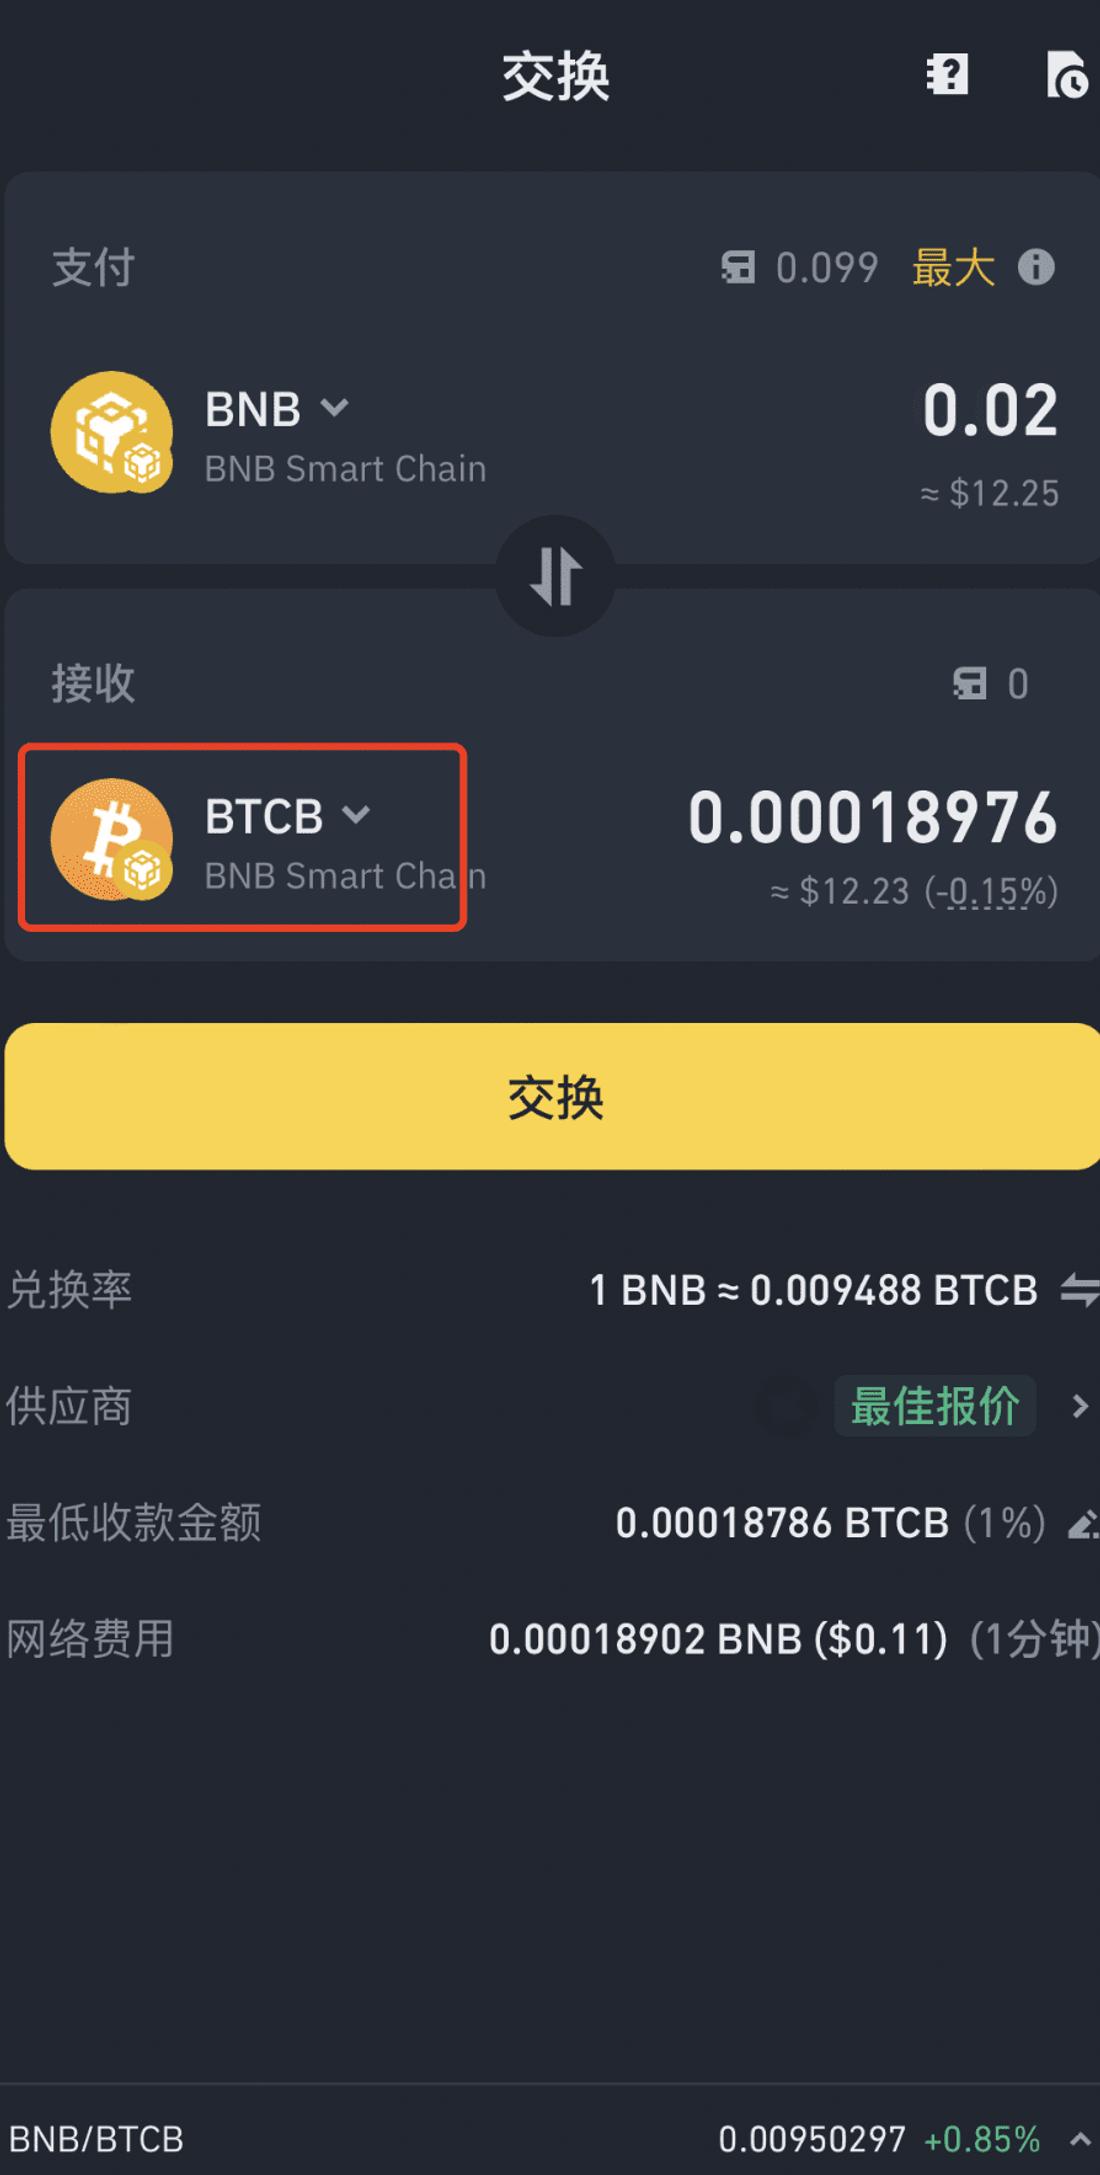
 I have prepared 60 dollars worth of BNB , which is now in my Web3 wallet. Next, I need to exchange some BTC . Because it is on the BSC network, BTC is called BTCB. Find the exchange function in the middle at the bottom as shown below.
 Then you need to exchange BTCB worth at least $7. Select BTCB and enter the amount of ** BNB ** you want to exchange. I exchanged a little more in the screenshot.
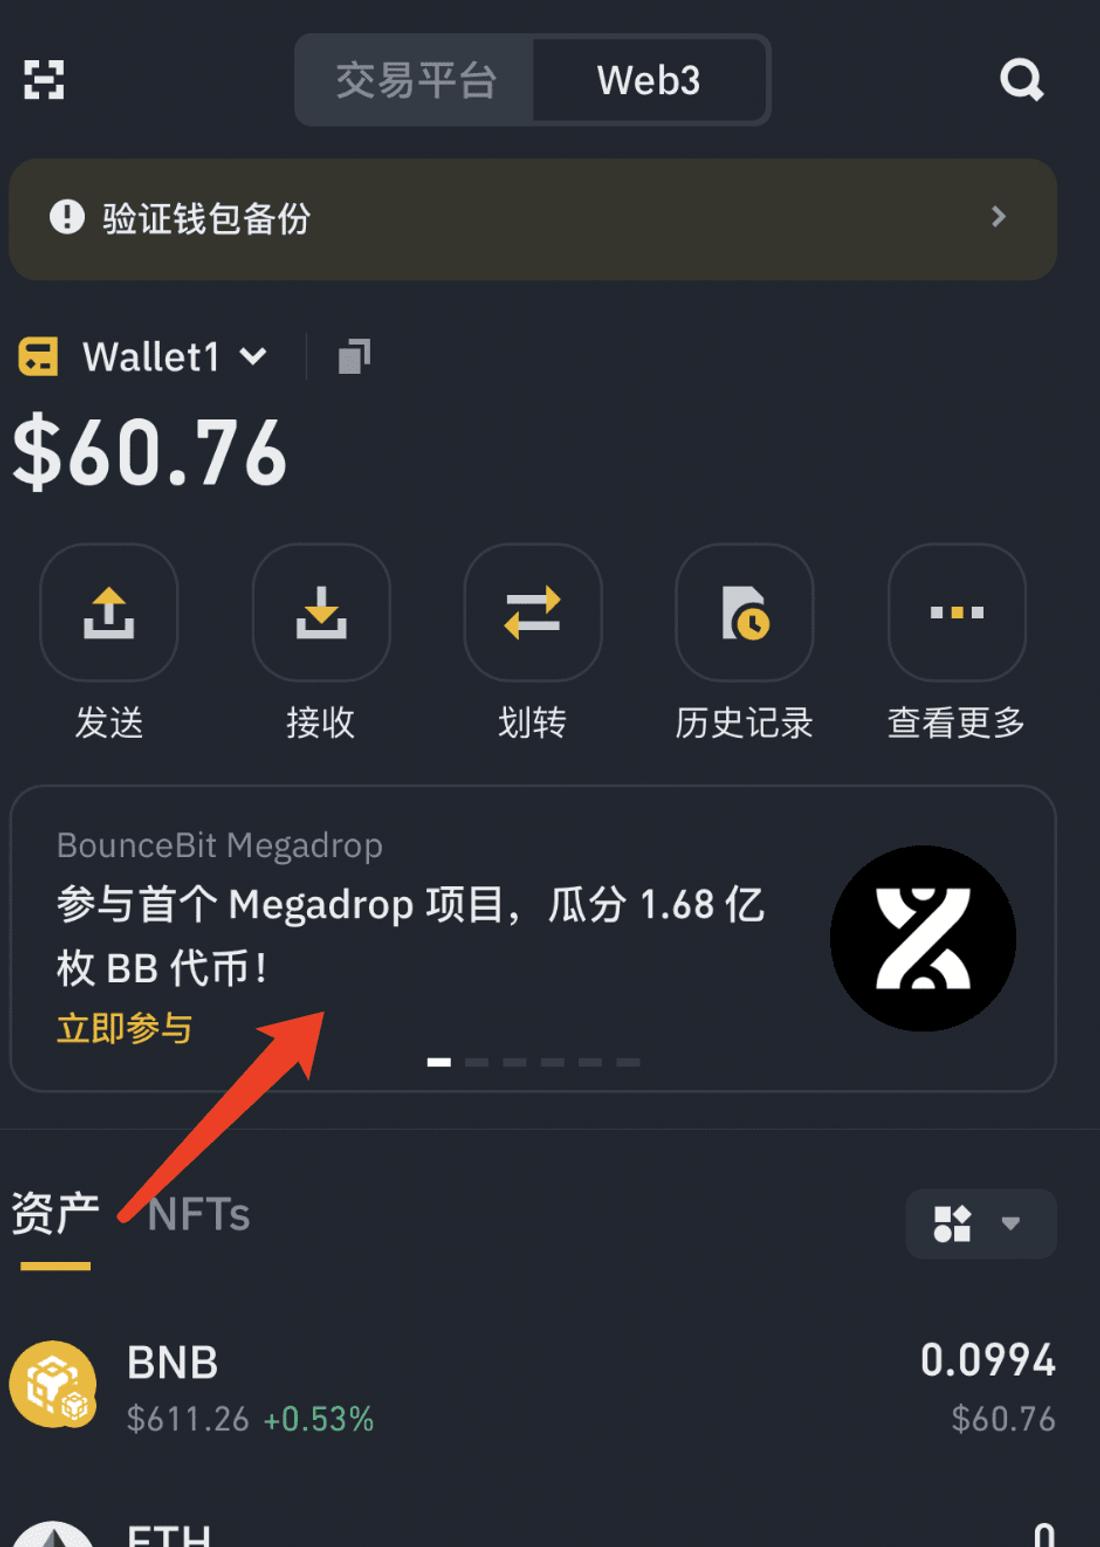
 After you successfully exchange, you will have BTCB in your wallet. Then the last step is to click on the banner ad in the middle of the Web3 wallet page.
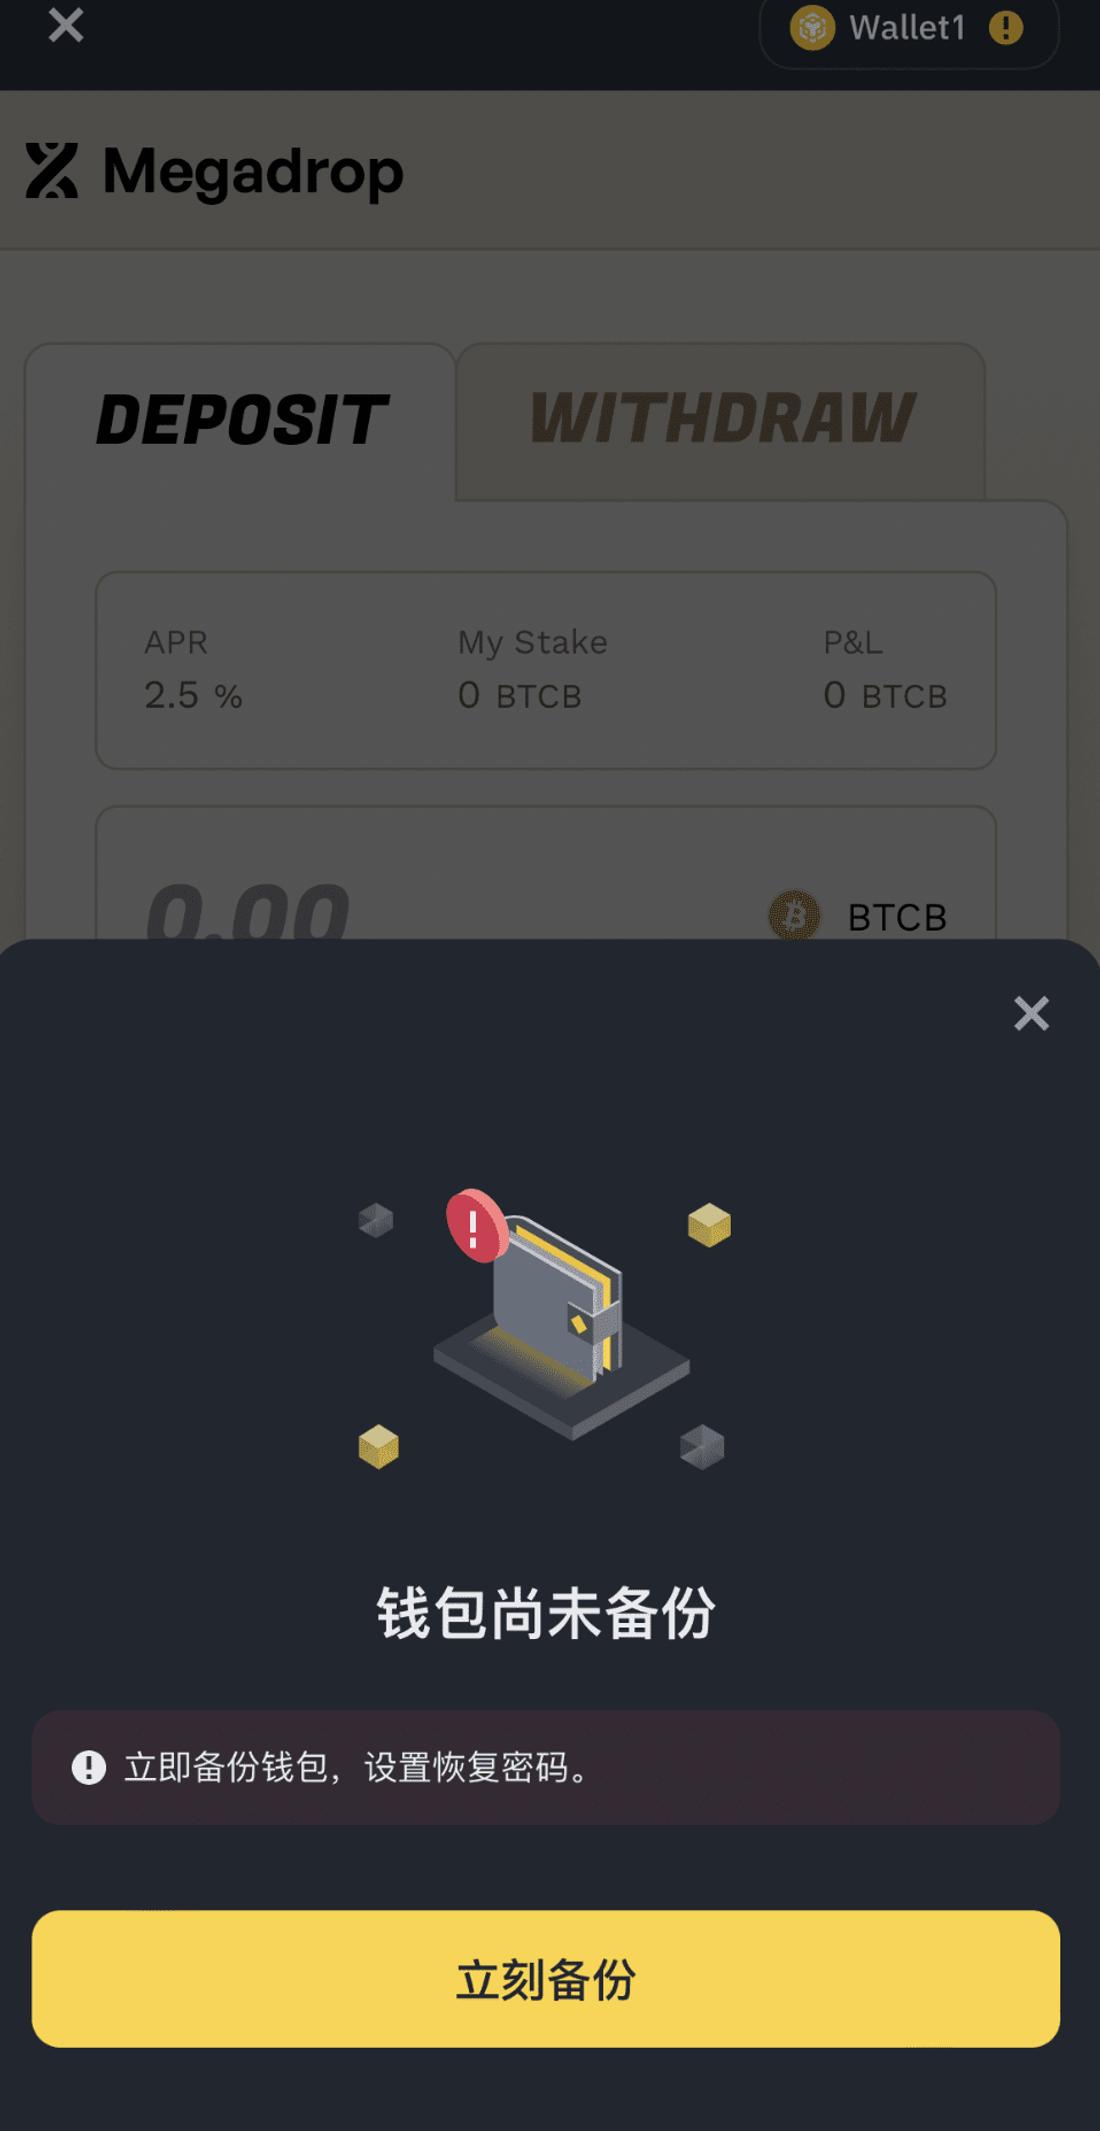
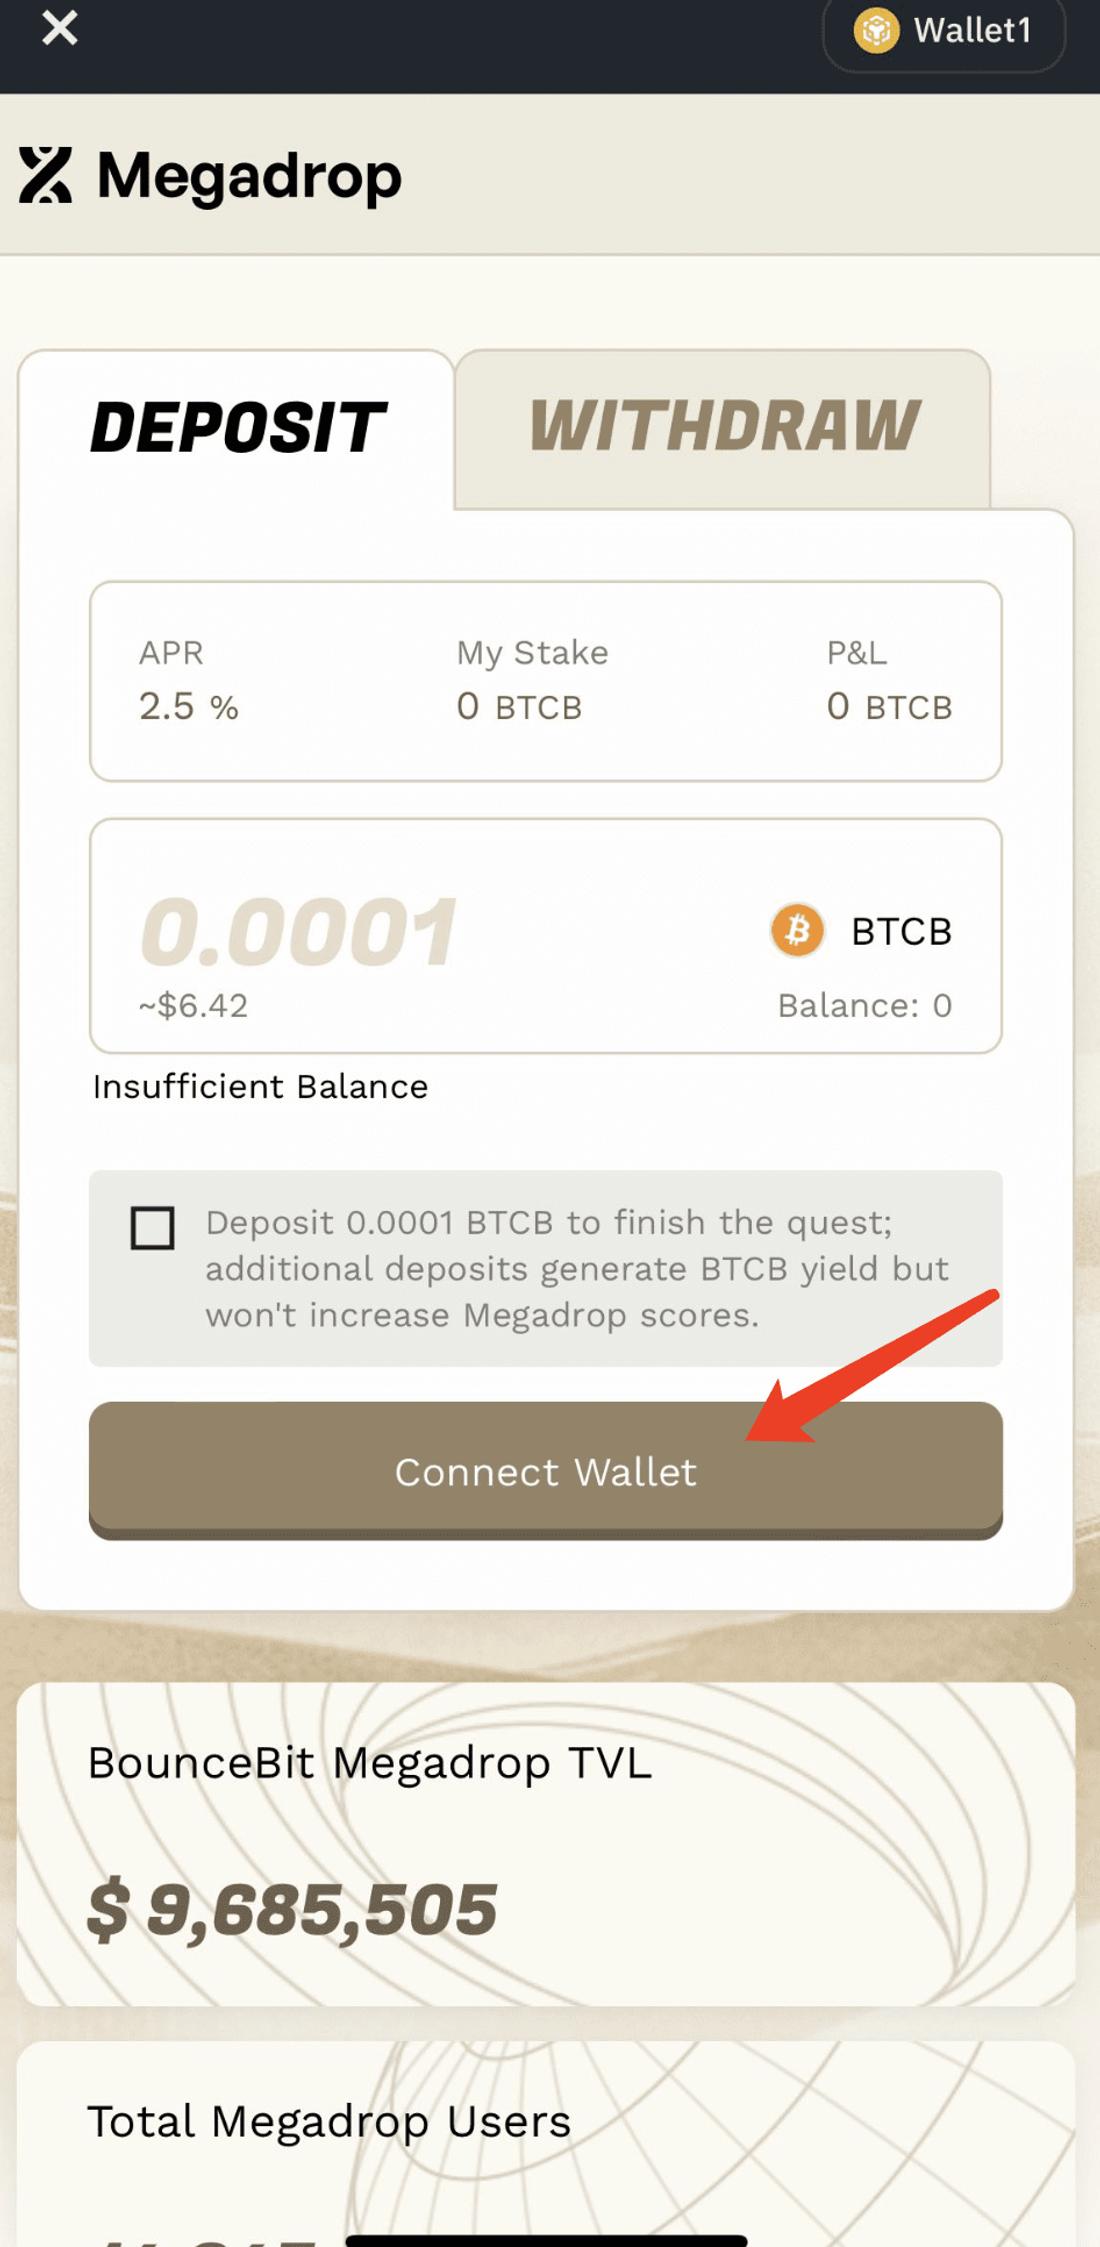 Connect your wallet on the page that opens, then remember to check the small box, then click Approve, then Deposit. These buttons are all in the same place, just click whichever pops up. When the Deposit button turns gray, it means the money has been saved and the task is complete.
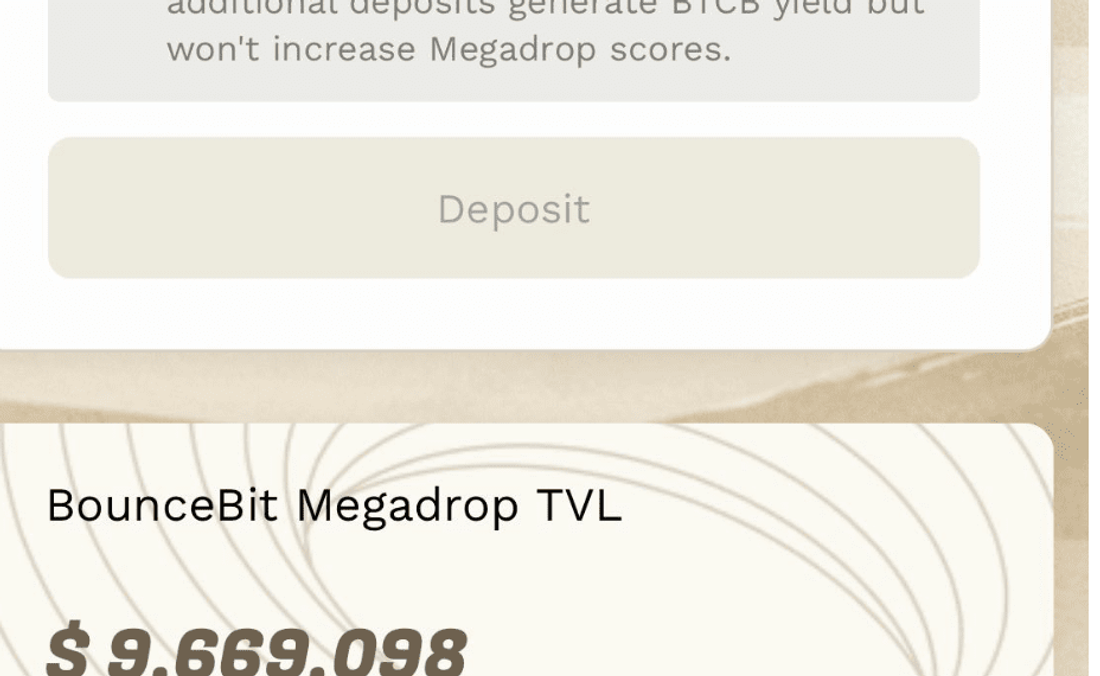 Now click the × in the upper left corner to close the page, and you can see that you have been prompted to complete the verification.
 Now that the points have started to be calculated, you can just lie back and wait for the next task.
It's not easy to create, I hope you can like and forward more to support me, so that I can continue to be motivated to make tutorials for beginners. Welcome to follow me on Twitter: https://twitter.com/BroLeonAus